
This is the first part of an ongoing series and one of the primary motivations for this blog.
Dory
I recently (late last year) bought a Chesapeake Light Craft (CLC) Northeaster Dory sailboat kit. The kit arrived early November and this month I finally got to crack it open!
A dory is a flat bottomed boat traditionally used for fishing. It's a fairly simple design which can carry pretty heavy loads. Hopefully it'll be good for someone who has some patience but essentially no woodworking skill.
The finished boat will be 17ft long, so the only room in my house large enough is the dining room. For some reason, Jill agreed to let me move the table and everything nice out of there and so, perched atop two sawhorses, sits a partially constructed sailboat.
Fortunately, the dining room has a door that leads outside, which the dory will fit though when complete. Unfortunately, it may take a bit of work to get that door to open...
Stitch and Glue
The CLC Dory is a stitch and glue construction, which means that the boat is first stitched together into shape, then glued with epoxy to hold it together and waterproof it.
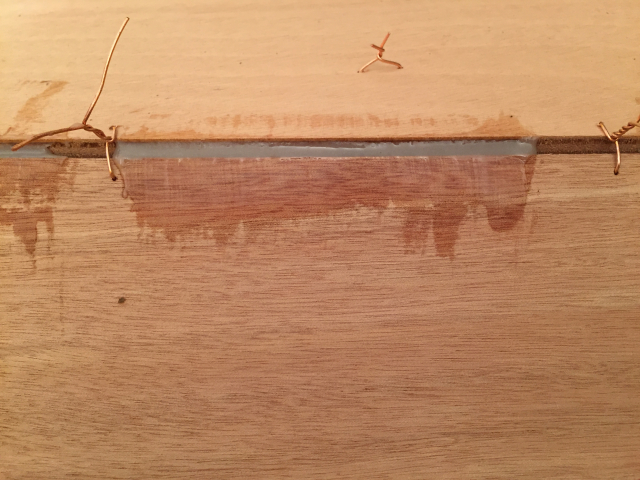
The stitches basically function as clamps while the epoxy is setting up (activating I believe it's called. I'll just calling it setting). The epoxy is the secret to making the whole process work. Pieces of the boat that are built on the bench are glued together and clamped with C clamps. The boat itself is stitched together with copper wire and then glued.
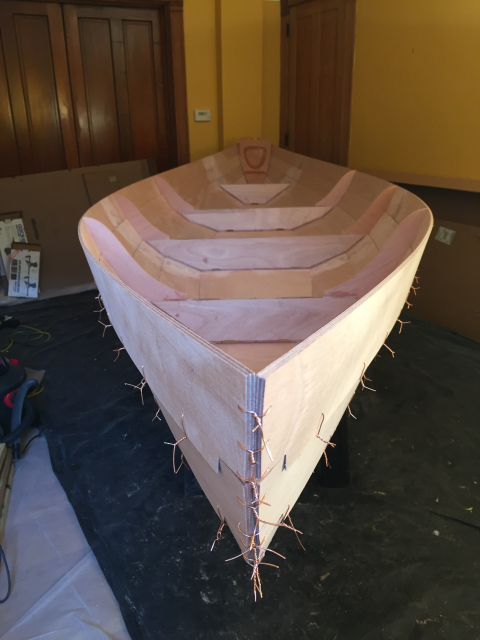
Current State
Right now, my boat is stitched together and awaiting glue. The bulkheads (essentially ribs in the boat) have already been stitched into place as have the side panels. The rest of my winter will be spent gluing, sanding and gluing again. So that hopefully in the spring I can paint and varnish outside.
Depending on how quickly I get photos ready to upload, I'll write something to show a few things I've done before this article was written, or go on to the next update.
(Thanks for reading)