
This was (will be) possibly the largest single step of the whole boat. Some things went well, some things went... less well. Over the course of Superbowl Sunday I spent about eight hours on this so let's get to it.
Beginnings
First task was to flip the boat back over and take all the stitches out. Recall that last time, we glued the panels together between the stitches. Fortunately, Dane was around to help so we were able to turn the boat back over without too much trouble. With the boat right-side-up, we pulled almost all the stitches out. There were a lot of stitches.
An awful lot of stitches.
Fillets!
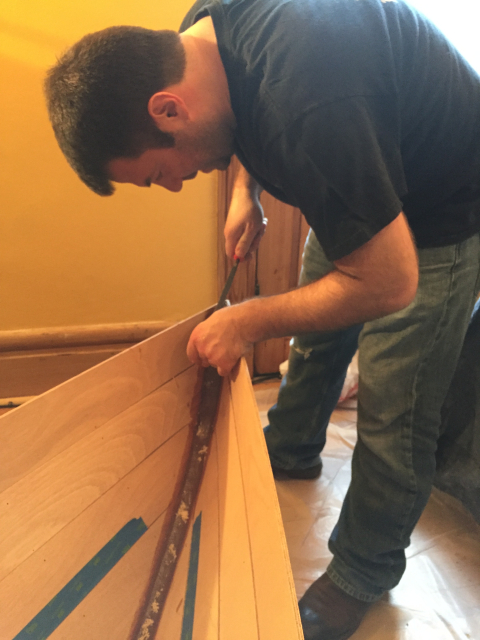
Next we filled in the seams at the bow and the stern with epoxy fillets (fillets are thick beads of epoxy smoothed over the seams). Then the seams between the bottom of the hull and the lowest hull panel got the same treatment. Jim had arrived at this point so he was back on the pastry bag.
The fillets at the bow and stern are huge, but the fillet around the bottom panel didn't hold much epoxy. While doing this, we discovered the big problem that plagued us the rest of the day.
Problems :(
For some reason, maybe because the room was warm, the epoxy was curing faster than expected. The thin seam around the bottom panel was almost impossible to smooth because the epoxy was hardening almost as soon as it came out of the bag. Most of those seams came out ok, but there were two that were pretty rough. We'll come back to this.
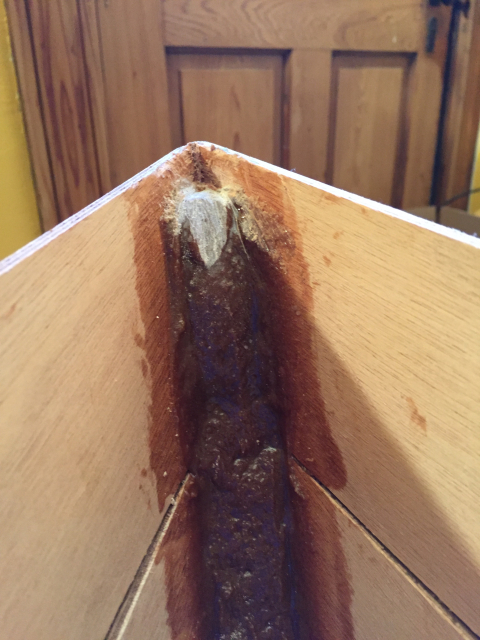
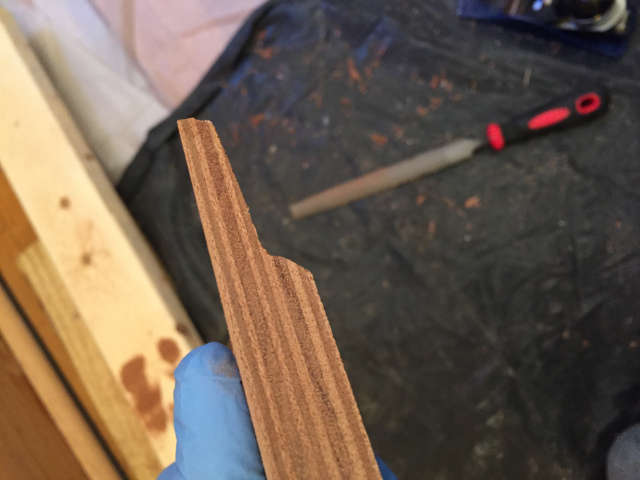
The second, and related, problem was that the epoxy in the big fillet on the inside of the bow was too thin, so we filled it up too high. I assumed this wouldn't be a problem in that I could let it cure a bit then cut the top out with a utility knife. Unfortunately, even this super thick fillet was hard as a stone by the time I came back to it. I ended up having to cut it back with a rasp.
This is about as far back as I could cut it without destroying the plywood at the bow.
At this point it's been around five hours. Jim and Dane have both had to head out, so I'm on my own for now. The fillets took a really long time, and there were a lot of them. Back to it.
The reason the fillet can't go to the top is because the breasthook has to fit there. Time to cut down the breasthook. Here's a side view of the notch I cut. That should just about fit. You can see the rasp on the floor in the background.
Ok, whew, moving on. To fiberglass. The fiberglass only covers the bottom and the first panel, so I applied nice blue painter's tape ring around the edge, then cut the fiberglass to fit.
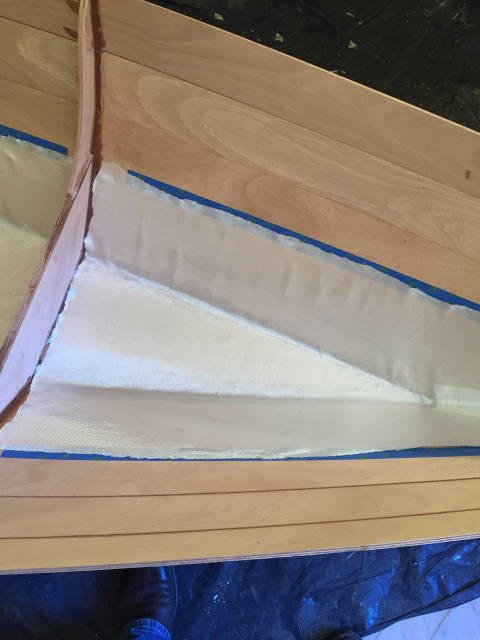
That should just about do it. Now, ideally, the fillets would still be tacky and the fiberglass would stick to it. Then I could smooth the fiberglass over the fillets and everything would stay in place for epoxying!
Moar Problems!
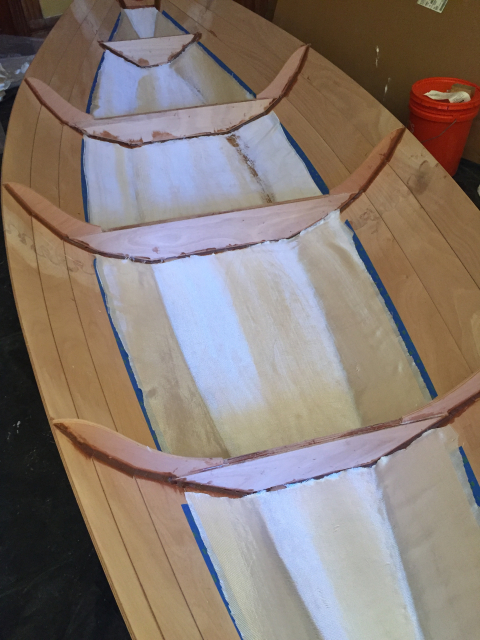
Unfortunately, our fillets were hard at this point, so the fiberglass didn't want to stay in place. Also, remember those seams that I couldn't get smooth? That left gaps under the fiberglass. Well, nothing to do but press on!
The fiberglass in this application just gets a coat of epoxy over it. Except for a couple of places where the fiberglass didn't lay down right, it actually went smoother than I expected. The only really bad part was the inside of the bow, where it was impossible to lay down epoxy and keep the strip of fiberglass in place on the dry fillet. I probably could have done it better but I was also exhausted at this point. No pictures of that, thank you very much.
Instead here's the fiberglass laid out in the bottom of the hull.
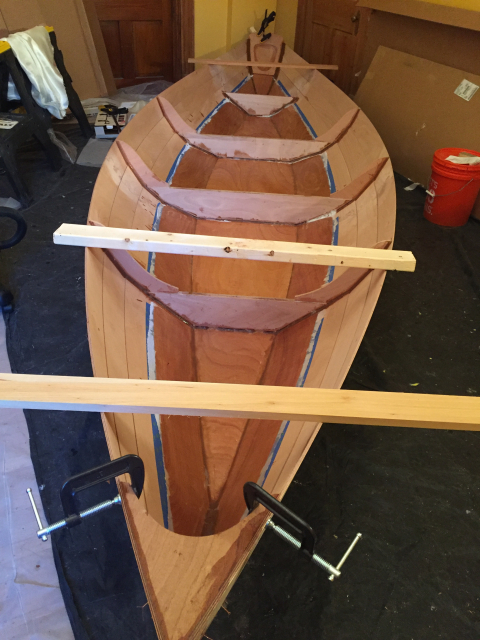
Slightly modified breasthook gets clamped above the epoxy wetted fiberglass. Fortunately my awesome wife Jill was there to lend some hands!

And ultimately, it comes out looking like a boat. More and more everyday. I'll have to check and see how it looks once it's dry, but I'm optimistic that it's not that bad. The epoxy really brings out the wood and I'm anxious to see what it looks like totally dry.
Current status: boaty!
Post Mortem
Ultimately, what I should have done was apply fillets in each compartment and fiberglass that compartment before moving on to the next compartment. That would at least have made the fiberglass go easier. I wonder if there is a rationale for the way the manual presented it, as in, do all the fillets to help the boat keep its shape before glassing, but I don't know.
The solution for the day should have been to just stop when I discovered that all the fillets were going to be hard. They didn't hold the fiberglass anyway, so I should have just come back and cleaned them up later, breaking this step in two. Regardless, there's something to be said for finishing even if I could have done a better job.
I would definitely consider going compartment by compartment on the next boat.